xLM has been fortunate to be working with many interesting projects mainly due to our ability to provide services beyond PLM, such as CAD programming. Recently, we were asked to find a solution to replace materials in SolidWorks part files on a regular basis and automate the process. Hence the Assign Materials tool was born.
This Assign Materials is a tool that lets users speed up the process of assigning materials by choosing the material once and applying it to all the selected parts. For instance, any time a material is not available at the fabricator, they might be asked to change the material from one material to another. This tool allows this change to happen much faster and more consistently (humans make mistakes – they could pick the wrong material by accident from the list).
For obvious reasons, our customer saw the value in this tool. The more parts the customer has to change, the more valuable this tool is to them. Changing the material in one part is the same as manually or with the tool. It is a big time savings for the customer to be able to change material in batch (multiple files) method.
The tool works as follows:
- Run ChangeMaterial.exe
- Select a Directory where SolidWorks Files exist
- Select All or specific files the tool will run on
- Pick the Source Material to find
- Material Options will be based on the default SolidWorks material database or a customer defined material database
- Pick Destination Material to replace
- Material Options will be based on the default SolidWorks material database or a customer defined material database
- Click ‘Apply Material’
The tool will search all selected file for the source material and if found replace that material with the destination material selected. See screen shot below of the Assign Part Material GUI.
Specific Instructions for the tool:
Assign Materials application
Step 1: Installation
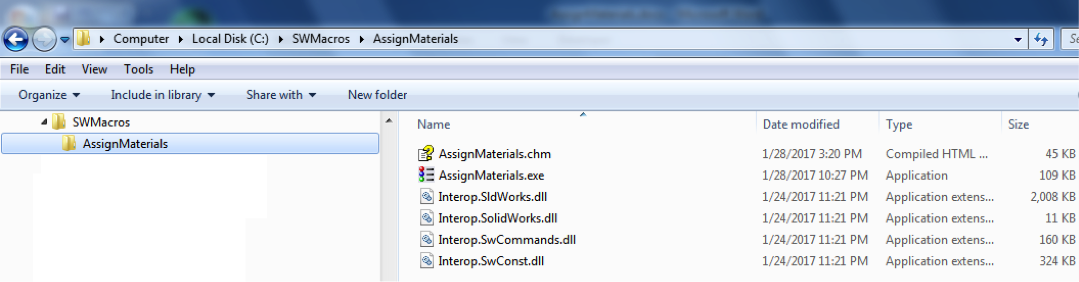
Create a directory named SWMacros then a sub-directory named AssignMaterials as shown here.
Then copy the 6 files as shown below to the AssignMaterials directory.
Step 2: Double-click the AssignMaterials.exe file to start the application.
Note: Feel free to make a short-cut to this file and place it on your desktop.
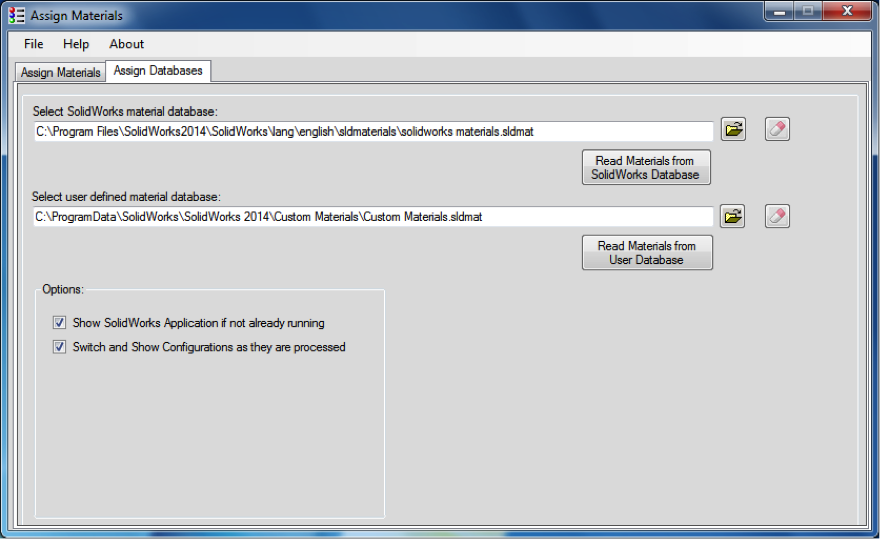
Step 3: Assign Databases
With the application started, click the Assign Databases tab.
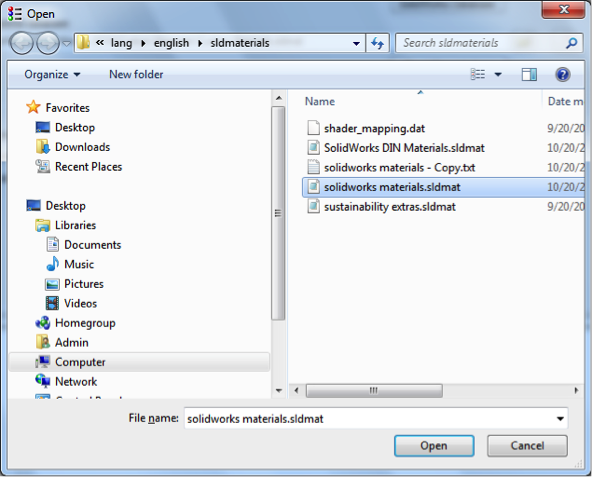
Next click the folder button at the far right to select the SolidWorks Materials.sldmat file.

Then click the folder button at the far right to select the User Defined Material Database file.
Note: Selecting the .sldmat file and clicking the Open button (show below) will automatically read in the materials (ex. 381 Materials read-in.)
The eraser buttons at the far right will erase the database information from this application.
It will not delete any .sldmat files!
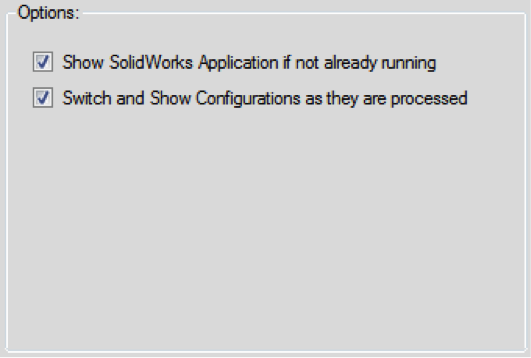
The Options area gives the user the option to see the SolidWorks application during the processing of changing materials, and the option to see the configurations as they are processed. Only configurations that will have the material changed will be seen by the user. Other configurations will just be skipped.
Step4: Assign Materials
Click the Assign Materials tab to switch to select which SolidWorks parts will be changed.
Use the folder button to select a directory that contains SolidWorks parts that will have the material changed.
Once a directory is selected, all SolidWorks part files will show in the list. Only SolidWorks part files. Assemblies and drawings and any other type of file will not be shown.
The user may select one or more SolidWorks part files in the list.
The button with the green arrows at the right is a Refresh button to refresh the list of files listed.
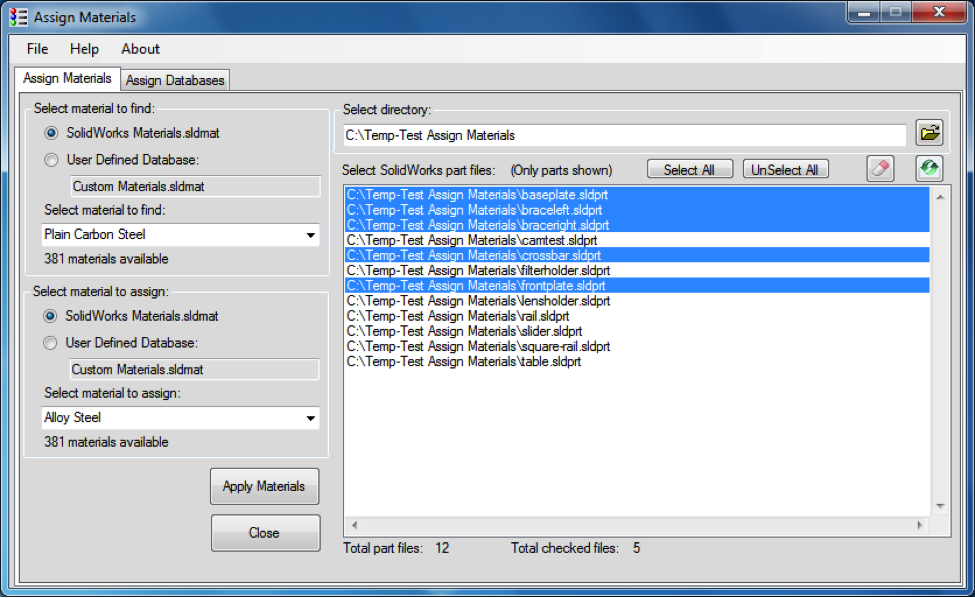
With SolidWorks part files selected, select the material database for the material to find. Typically just click the “SolidWorks Materials.sldmat” radio button and then select the material to find from the drop-down list.
Next do the same for the material to assign to the SolidWorks parts. Click the appropriate material database and the select the material to assign.
When you are finished with your selections, click the Apply Materials button. If SolidWorks is not currently running, it will start SolidWorks. If it is currently running, it will use the active session of SolidWorks.
The program will then open each select part file, go through every configuration of that part file, check to see if the material of that configuration matches the Find material, and if it does it then replaces the material with the Assign material. Then it saves the file only if the material was changed in any of its configurations.
If SolidWorks was not previously running when the application started, then the application will close SolidWorks otherwise the SolidWorks session will remain open.
If you are interested in this tool or any other CAD programming service do not hesitate to contact us.
Written by XLM Solutions
Copyright 2017, All Rights Reserved